
Collaboration Manager (ExCM) 2010 has the ability to greatly reduce the
workload on your IT Department by implementing what we call “Site
Sponsors.” Site Sponsors can be either
Windows or Forms Based Authentication (FBA) users, and are basically users with
some elevated privileges who are capable of managing the Extranet Users for a
given site. Let’s take a closer look at
Sponsorship and how it’s configured.
Management” menu located in Site Settings:

well as the options for managing them:

client of ours who uses our extranet to access information important to
them. We will create a new Site Sponsor,
a user from the ACME Corporation, and make him responsible for managing all the
ACME users who access our extranet. This
is an “extreme” example of Sponsorship (since this sponsor is outside the
company), but I believe it illustrates the feature nicely. Now, let’s take a
closer look at how Sponsorship is configured.
After “New Site Sponsor” from the ribbon, the screen below is presented:

purpose of this illustration:

when using Sponsorship, so let’s take a close look at each area. The first area is the “Associative Security
Definition.” These are the SharePoint
Groups and/or Extranet Roles to which every user this Sponsor invites to the
site will automatically be added. In
this example, I have created a role name “ACME Members” and added that Role to this
site’s “Visitors” SharePoint Group. By
entering “ACME Members” in this area, every user that Timmy invites will
automatically be added to the “ACME Members” Role and will therefore have basic
read-only access since the Role has been added to the site’s “Visitors” group.

Definition.” Any SharePoint Group and/or
Extranet Role entered here will be presented as checkboxes to the Sponsor when
he invites users to the site. In this
example, I have entered another Role I created named “ACME Managers” that has
greater privileges than the “Members” Role because I have added it to the
site’s “Owners” SharePoint Group:

Definition.” This includes the Groups
and/or Roles that the Site Sponsor can manage.
When we say “manage” in this situation, we are referring to specific
permissions the Sponsor has been granted.
Here are the possible permissions that can be assigned:
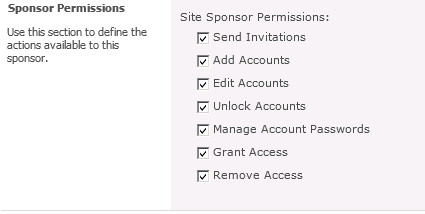
them to your specific needs. The best
practice for the “Administrative Security Definition” is to add any Groups
and/or Roles that appear in the first two Security Definition boxes. This ensures that any user the Sponsor
Invites, he can also manage:

Groups the Sponsor is currently associated with for the site will be included
in both the Optional and Administrative Security Definitions. For this example, I will select “No” in this
area:

Now that we have successfully created a Site Sponsor, let’s
log into our site as that Sponsor and invite a new user from the ACME
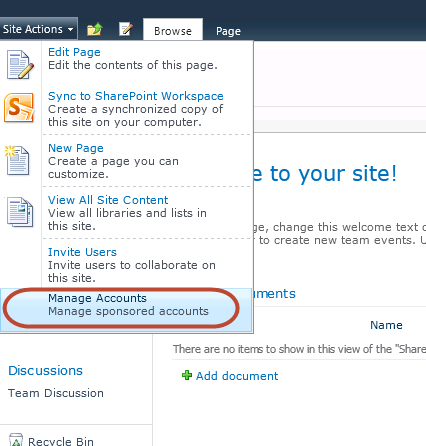
Corporation. Here are the new options that
the new Sponsor sees when clicking “Site Actions:”

existing users that they sponsor. After
clicking on “Invite Users,” we see this:
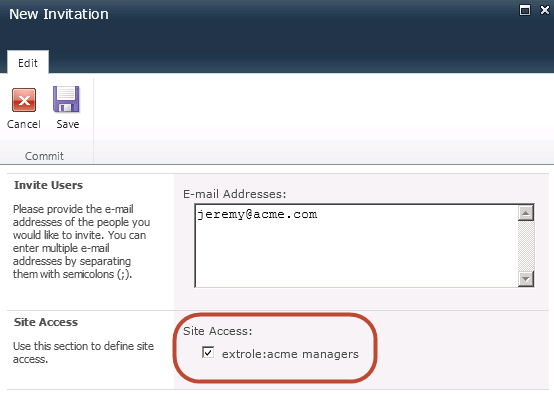
Definition appears here to allow the Sponsor to optionally add the new user to
the Groups and/or Roles specified…along with the “Associative” Security
Definition to which they will be added automatically (ACME Members in this
case).
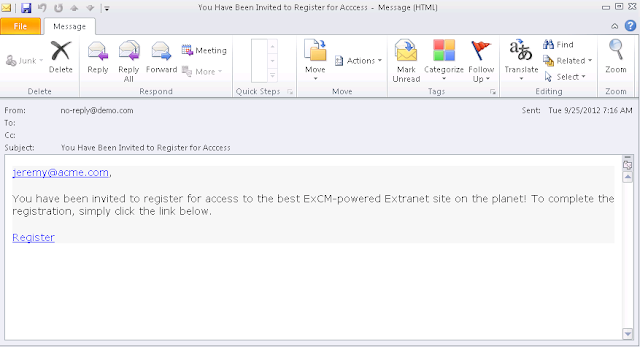
user. When they open it, here’s what
they see:
After completing the registration, we can review it under
the “Invitations” area of the Extranet Management menu. Notice the “Sent By” and “Security Definition”
areas:

Sponsor, and that Jeremy was also added to the appropriate Security
Definitions.
for the Site Sponsor. After logging back
in as my new Sponsor and clicking “Site Settings – Manage Users,” we see this:

From here, the Sponsor can do things like create new user
(via invitation or manually), grant and remove access, change a user’s
password, etc. Notice that we see an
additional user than the one we just invited.
This is due to the “Administrative Security Definition.” The other user (Tony) is also a member of the
ACME Members and ACME Managers Roles, so our new Sponsor can also manage him.
offload basic extranet administration tasks to capable, responsible users,
freeing up their time for important IT work, and reducing IT labor costs.


